技术实践
# 引言
该文档用于记录项目中的技术实践经验,为更好的吸收知识,更好的回顾知识
# 常用布局相关
## 元素或文本(水平,垂直)居中
```language
display: flex;
align-items: center;
justify-content: center;
```
## 相对位移布局
```language
.img-size-min{
position:absolute;//关键属性 按照当前设置的相对位置排版
top: 0;//图片距离顶部多少
width: 44rpx; //定位图片的宽度
height: 44rpx;//定位图片的高度
}
```
## 水平垂直布局
```language
display: flex;
flex-direction: row; 或 flex-direction: column;
```
## 界面比例布局
视图的height绑定赋值,由后端js计算后赋值,如:
wxml:
```language
<scroll-view style="height:{{section_Top_Height}}px" scroll-y="true" enable-flex="true" show-scrollbar="false">
</scroll-view>
```
js:
在onShow函数中计算比例数据,并赋值
```language
onShow: function (options) {
var that = this;
//换算比例布局
wx.getSystemInfo({
success: function (res) {
console.log(res.windowHeight);
that.setData({
section_Top_Height: res.windowHeight / 568 * 520,
section_Bottom: res.windowHeight - res.windowHeight / 568 * 520,
})
}
})
)
```
# 自定义组件
开发者可以将页面内的功能模块抽象成自定义组件,以便在不同的页面中重复使用;也可以将复杂的页面拆分成多个低耦合的模块,有助于代码维护。自定义组件在使用时与基础组件非常相似。
## 创建组件
类似于页面,一个自定义组件由 json wxml wxss js 4个文件组成。要编写一个自定义组件,首先需要在 json 文件中进行自定义组件声明<font color=red size=3>将 component 字段设为 true 可将这一组文件设为自定义组件</font>
`{
"component": true
}
`
<font color=red size=3>注意:在组件wxss中不应使用ID选择器、属性选择器和标签名选择器</font>
在自定义组件的 js 文件中,需要使用 Component() 来注册组件,并提供组件的属性定义、内部数据和自定义方法。
组件的属性值和内部数据将被用于组件 wxml 的渲染,其中,属性值是可由组件外部传入的。更多细节参见 [Component构造器](Component构造器) 。
```C#
Component({
properties: {
// 这里定义了innerText属性,属性值可以在组件使用时指定
innerText: {
type: String,
value: 'default value',
}
},
data: {
// 这里是一些组件内部数据
someData: {}
},
methods: {
// 这里是一个自定义方法
customMethod: function(){}
}
})
```
## 使用自定义组件
使用已注册的自定义组件前,首先要在页面的 json 文件中进行引用声明。此时需要提供每个自定义组件的标签名和对应的自定义组件文件路径:
my-select是组件的命名,后面是组件的定义位置
```language
{
"usingComponents": {
"my-select": "/components/my-selector"
}
}
```
然后在改界面的wxml中即可通过定义的组件名称来应用改组件了:

## 下拉菜单组件

### .json
```language
{
"usingComponents": {},
"component": true
}
```
### .wxml
```<view class='com-selectBox'>
<view class='com-sContent' bindtap='selectToggle'>
<view class='com-sTxt'>{{nowText}}</view>
<image src='https://img-blog.csdnimg.cn/f5a585381e8c491b8d69e036659bd711.png#pic_center' class='com-sImg' animation="{{animationData}}"></image>
</view>
<view class='com-sList' wx:if="{{selectShow}}">
<view wx:for="{{propArray}}" data-index="{{index}}" wx:key='' class='com-sItem' bindtap='setText'>{{item}}</view>
</view>
</view>
```
### .wxss
```language
<view class='com-selectBox'>
<view class='com-sContent' bindtap='selectToggle'>
<view class='com-sTxt'>{{nowText}}</view>
<image src='https://img-blog.csdnimg.cn/f5a585381e8c491b8d69e036659bd711.png#pic_center' class='com-sImg' animation="{{animationData}}"></image>
</view>
<view class='com-sList' wx:if="{{selectShow}}">
<view wx:for="{{propArray}}" data-index="{{index}}" wx:key='' class='com-sItem' bindtap='setText'>{{item}}</view>
</view>
</view>
```
### .js
```language
// Componet/Componet.js
Component({
/**
* 组件的属性列表
*/
properties: {
propArray:{
type:Array,
observer: function(newVal, oldVal) {
this.setData({nowText:newVal[0]})
}
}
},
/**
* 组件的初始数据
*/
data: {
selectShow:false,//初始option不显示
nowText:"请选择",//初始内容
selectindex:0,//选中的下标
animationData:{}//右边箭头的动画
},
/**
* 组件的方法列表
*/
methods: {
//option的显示与否
selectToggle:function(){
var nowShow=this.data.selectShow;//获取当前option显示的状态
//创建动画
var animation = wx.createAnimation({
timingFunction:"ease"
})
this.animation=animation;
if(nowShow){
animation.rotate(0).step();
this.setData({
animationData: animation.export()
})
}else{
animation.rotate(180).step();
this.setData({
animationData: animation.export()
})
}
this.setData({
selectShow: !nowShow
})
},
//设置内容
setText:function(e){
var nowData = this.properties.propArray;//当前option的数据是引入组件的页面传过来的,所以这里获取数据只有通过this.properties
var nowIdx = e.target.dataset.index;//当前点击的索引
var nowText = nowData[nowIdx];//当前点击的内容
//再次执行动画,注意这里一定,一定,一定是this.animation来使用动画
this.animation.rotate(0).step();
this.setData({
selectShow: false,
nowText:nowText,
selectindex:nowIdx,
animationData: this.animation.export()
})
//组件间事件通信
var myEventDetail = {data:this.data} // detail对象,提供给事件监听函数
var myEventOption = {} // 触发事件的选项
this.triggerEvent('myevent', myEventDetail, myEventOption)
}
}
})
```
### 应用组件
wxml中
```language
<my-select class="Select" prop-array="{{ filter.getData(listTransducers[Transducersindex]['listSubType'], 'strSubType') }}" value="{{SubTypeindex}}" bindmyevent="listSubTypeSelected"></my-select>
```
js中
```language
listSubTypeSelected: function(e) {
this.setData({
SubTypeindex: e.detail.data.selectindex
});
},
```
## 调用组件内部属性或方法
应用组件时定义一个唯一id(如:Transducers),JS中通过该id获取控件对象。通过该控件对象调用其内部属性或方法:
```language
Updata:function()
{
console.log("获取控件的数据对象》》》")
var obj=this.selectComponent('#Transducers')
console.log(obj.properties.myValue=2)
console.log(obj.Txmethods())
}
```
# 自定义模板
## 定义模板
WXML提供模板(template),可以在模板中定义代码片段,然后在不同的地方调用。
使用 name 属性,作为模板的名字。然后在 template 内定义代码片段,如:
```language
<template name="firewmare">
<view class="title">仪表信息</view>
<view class="parent">
<view class="left">固件版本</view>
<input class="right" disabled="true" class="weui-input" auto-focus placeholder="{{version}}"/>
</view>
<view class="parent">
<view class="left">序列号</view>
<input class="right" disabled="true" class="weui-input" auto-focus placeholder="{{sn}}"/>
</view>
<view class="parent">
<view class="left">通讯密码</view>
<input class="right" class="weui-input" auto-focus placeholder="{{password}}"/>
</view>
<view class="parent">
<view class="left">用户标签</view>
<input class="right" class="weui-input" auto-focus placeholder="{{tag}}"/>
</view>
</template>
```
## 应用模板
wx:if是条件判断,满足条件则展示
```language
<template is="firewmare" data="{{...firmware}}" wx:if="{{isScan}}"/>
```
# 界面布局悬浮停靠
## 顶层悬浮
常见的顶层搜索按钮处理
```language
<view class="container">
<view class="header">
<view class="box">
<image src="/images/icon/search.png"></image>
<text>搜索书籍</text>
</view>
</view>
<view class="sub-container">
<image class="head-img" src="/images/book/quality.png"></image>
<view class="books-contaienr">
<block wx:key="id" wx:for="{{books}}" >
<v-book book="{{item}}" />
</block>
</view>
</view>
</view>
```
wxss代码
```language
.header {
display: flex;
position: fixed;
background-color: #ffffff;
height: 100rpx;
width: 100%;
border-top: 1px solid #f5f5f5;
border-bottom: 1px solid #f5f5f5;
flex-direction: row;
align-items: center;
justify-content: center;
box-shadow: 0 0 3px 0 #e3e3e3;
z-index: 99;
}
```
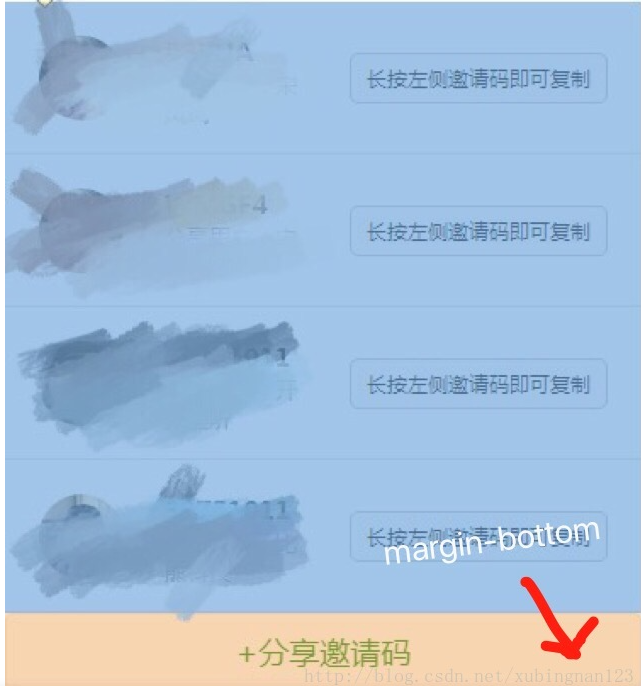
## 底部悬浮
wsxx代码:
position:fixed 和bottom:0 这两句让按钮至于页面底部
```language
.share-btn
{
width:100%;
color:green;
position:fixed;
bottom:0;
}
```
## 项目中底层悬浮按钮
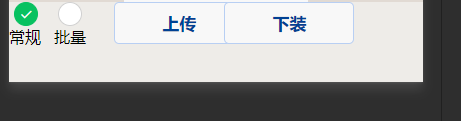
```language
<view class="section_Down" style="height:{{section_Down_Height}}px;flex-direction:row;">
<view style="flex-direction:column;">
<view class="child" style="flex-direction:row;">
<radio-group style="width:100px;">
<radio style="margin-left: 5px;" checked="true" value="常规"></radio>
<radio style="margin-left: 15px;" value="批量"></radio>
</radio-group>
<text>常规</text>
<text style="margin-left: 13px;">批量</text>
</view>
<view class="child">
<button style="width:130px;margin-left: 5px;" class="StartBatch">上传</button>
</view>
<view class="child">
<button style="width:130px;margin-left: 15px;" class="StartBatch">下装</button>
</view>
<!-- <view wx:if="{{isBatch}}">
<view class="child">
<input class="batchvale" type="number" auto-focus placeholder="批量上限"></input>
</view>
<button class="child StartBatch">开始</button>
</view> -->
</view>
</view>
```
wxss
```language
.child{
float: left;
width: 23%;
margin-right: 5px;
}
.batchvale
{
height: 40px;
text-align: center;
color: #004193;
border-radius: 10rpx;
border: 2rpx solid #FFB000;width:150rpx;
}
.StartBatch{
font-weight: 550;
text-align: center;
color: #004193;
border-radius: 10rpx;
border: 2rpx solid #b8cff3;width:150rpx;
}
```
# 表单验证
## 表单验证插件
[一个表单验证插件介绍](https://blog.csdn.net/ChibiMarukoChan/article/details/86496769)
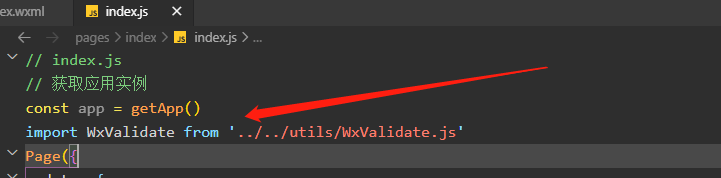
### 应用方式
1:项目中放置插件JS文件

2:界面中引入JS文件
3:wxml中建立表单,如:
```language
<form bindsubmit="formSubmit">
<!--社团名称-->
<view class="info-list">
<view class="info-list-1eft">
<text>社团名称</text>
<text class="left-star">*</text>
</view>
<view class="info-list-right">
<input name='name' placeholder='请输入' value='{{form.name}}' class="inputName" />
</view>
</view>
<!--按钮--->
<view class="buttons-kind">
<button class="fabu" form-type="submit">发布</button>
</view>
</form>
```
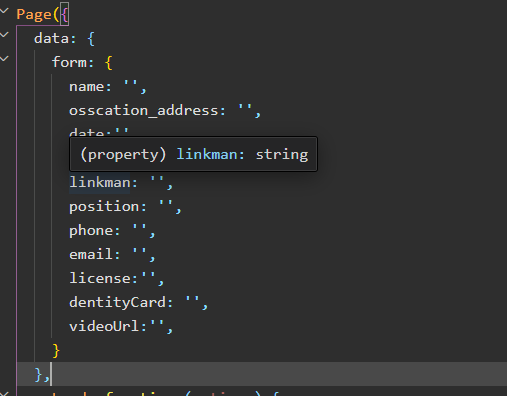
4:界面JS中先保存表单数据对象
5:onLoad中加载验证方法
```language
onLoad: function (options) {
//验证方法
this.initValidate();
},
```
6:表单验证字段规则设定以及提示文本
```language
/***验证表单字段 */
initValidate:function(){
const rules = {
name: {
required: true,
maxlength: 10,
}
}
const messages = {
name: {
required: '请填写社团名称',
maxlength: '社团名称长度不超过10个字!'
}
}
this.WxValidate = new WxValidate(rules, messages)
},
```
7:调用验证函数以及报错提示
```language
/***调用验证函数***/
formSubmit: function (e) {
console.log('form发生了submit事件,携带的数据为:', e.detail.value)
const params = e.detail.value
e.detail.value.osscation_address = this.data.osscation_address
e.detail.value.date = this.data.date
console.log(e.detail.value)
//校验表单
if (!this.WxValidate.checkForm(params)) {
const error = this.WxValidate.errorList[0]
this.showModal(error)
return false
}
//向后台发送时数据 wx.request...
// this.showModal({
// msg: '提交成功'
// })
},
/***报错 **/
showModal(error) {
wx.showModal({
content: error.msg
})
},
```
## 项目中表单验证
### JS中处理
引用表单验证插件
```language
import WxValidate from '../../../utils/WxValidate.js'
```
定义校验规则常量
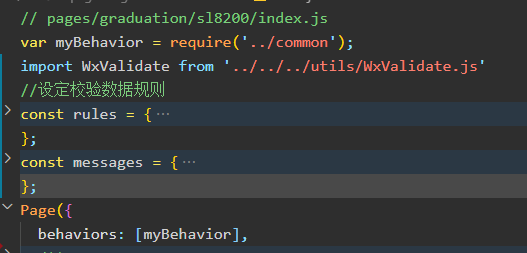
```language
//设定校验数据规则
const rules = {
m_PvOffset:{
digits: true,
min: 5,
max:100
}
};
const messages = {
m_PvOffset:{
digits:'输入数据有误',
min:'偏移量不能小于'+rules.m_PvOffset.min,
max:'偏移量不能大于'+rules.m_PvOffset.max,
}
};
```
data中存储校验结果
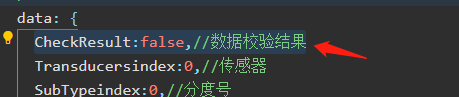CheckResult:false,//数据校验结果
调用验证时调整验证结果
```language
/***调用验证函数***/
formSubmit: function (e) {
console.log('form发生了submit事件,携带的数据为:', e.detail.value)
const params = e.detail.value
e.detail.value.osscation_address = this.data.osscation_address
e.detail.value.date = this.data.date
console.log(e.detail.value)
//校验表单
if (!this.WxValidate.checkForm(params)) {
const error = this.WxValidate.errorList[0]
this.showModal(error)
this.data.CheckResult=false
}else
{
this.data.CheckResult=true
}
},
```
# 数据缓存
[一个数据缓存案例介绍](https://www.cnblogs.com/marvin-wen/p/12268834.html)
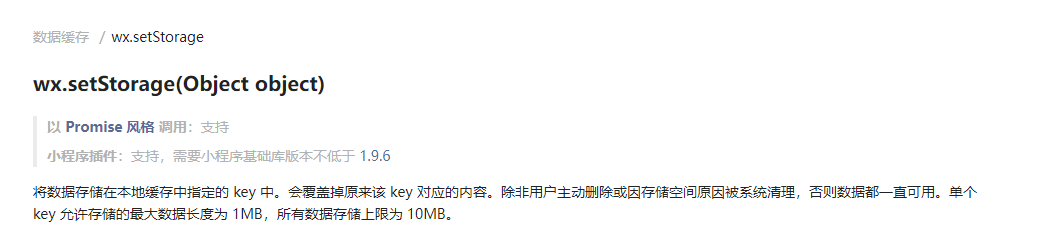
[小程序缓存说明](https://developers.weixin.qq.com/miniprogram/dev/api/storage/wx.setStorage.html)
有些表数据,数据很少,但是程序加载的时候要马上访问,并且访问的很频繁,针对这种情况,将数据放到程序的本地缓存中即内存中,从而提升系统的访问效率。
## 存储缓存数据
### 界面JS中应用缓存存储:

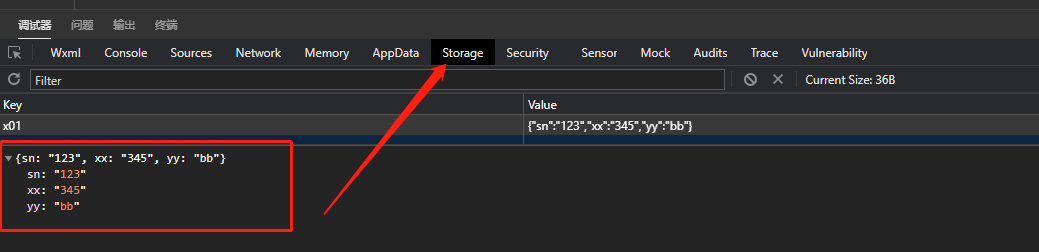
demo是对象,案例中把对象通过JSON.stringify序列化放入缓存
```language
onShow: function () {
console.log('guxiaobai');
const demo = {sn: '123', xx: '345', yy: 'bb'};
wx.setStorage({
key: 'x01',
data: JSON.stringify(demo)
})
},
```
调试中查看缓存:
## 取出缓存数据
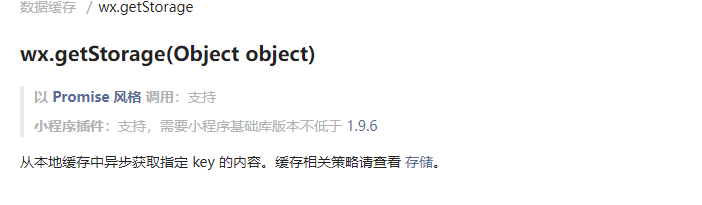
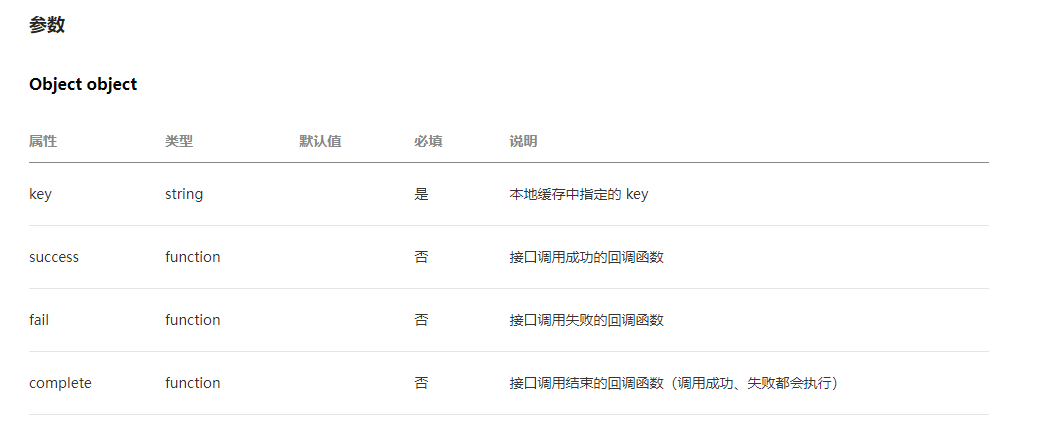
### 界面JS中取出缓存数据
```language
wx.getStorage({
key: 'x01',
success (res) {
console.log(res.data)
}
})
```
## 移除缓存
```language
wx.removeStorage({
key: 'x01',
success (res) {
console.log("移除缓存对象~"+res)
}
})
```
# 界面跳转
## 锚点跳转
简单理解,就是点击元素滚动跳转到指定以一个锚点元素位置
### 简单导航
wxml:
```language
<view class="list">
<view class="a" bindtap='jumpTo' data-myid="list0">list0</view>
<view class="a" bindtap='jumpTo' data-myid="list1">list1</view>
<view class="a" bindtap='jumpTo' data-myid="list2">list2</view>
</view>
<scroll-view class="ab" scroll-into-view="{{toViewid}}" scroll-y="true" scroll-with-animation="true">
<view class="b" wx:for="{{list}}" wx:key="index" id="list{{index}}">
{{item}}
</view>
</scroll-view>
```
js:
```language
//index.js
//获取应用实例
const app = getApp()
Page({
data: {
list: ["list0", "list1", "list2"],
toViewid: '',
},
jumpTo: function (e) {
// 获取标签元素上自定义的 data-myid 属性的值
let myid = e.currentTarget.dataset.myid;
console.log(myid);
this.setData({
toViewid: myid
})
}
})
```
wxss:
```language
page{
height: 100%;
}
.list{
display: flex;
justify-content:center;
}
.a{
background-color: #005146;
width: 300rpx;
text-align: center;
}
.ab{
height: 100%;
background-color: #0094ff;
}
.b{
height: 100%;
padding: 0 11px;
}
```
## 路由跳转
```language
//保留当前页面,跳转到应用内的某个页面
wx.navigateTo({
url: 'home?cid=1'
})
//关闭当前页面,跳转到应用内的某个页面
wx.redirectTo({
url: 'home?cid=1'
})
//关闭所有页面,打开到应用内的某个页面。
wx.reLaunch({
url: 'home?cid=1'
})
//跳转到 tabBar 页面,并关闭其他所有非 tabBar 页面
wx.switchTab({
url: '/home'
})
```
### 跳转页面传递数组参数必须序列化
```language
let categoryArr=[1,2,3,4,5]
category = JSON.stringify(categoryArr) //取子集分类 数组传递需要序列化
wx.navigateTo({
url: `../jumpPage/home/?cate= ${category} `,
})
```
接收页面也要序列化参数
```language
onLoad: function (options) {
let category = JSON.parse(options.cate);
console.log(category)
}
```
参数值过长接收时候内容不全得问题
```language
//传参
wx.navigateTo({//wx.redirectTo、wx.reLaunch
url: '../details/details?id=' + encodeURIComponent(id)
//接收
onLoad(options) {
var id = decodeURIComponent(options.id);
}
```