安装geoserver
- 下载
wget https://jaist.dl.sourceforge.net/project/geoserver/GeoServer/2.15.1/geoserver-2.15.1-bin.zip
- 解压
unzip geoserver-2.15.1-bin.zip
- 修改端口
cd geoserver-2.15.1
vi start.ini
修改下面的内容
jetty.port=8003
- 启动程序
cd bin
./startup.sh
设置GEOSERVER_HOME
不设置GEOSERVER_HOME,只能进入到geoserver的根目录下执行
startup.sh;设置GEOSERVER_HOME以后,就可以在任何目录来启动geoserver
vi /etc/profile
增加以下代码:
export GEOSERVER_HOME=/opt/geoserver-2.15.1
保存后使配置生效:
source /etc/profile
支持跨域
下载jetty-servlets
从http://repo1.maven.org/maven2/org/eclipse/jetty/jetty-servlets/下载对应版本的jetty。对应关系可以去geoserver中的lib目录下查看
当前对应版本为jetty-servlets-9.4.12.v20180830.jar
下载后将此jar上到geoserver-2.15.1/webapps/geoserver/WEB-INF/lib修改web.xml
修改geoserver-2.15.1/webapps/geoserver/WEB-INF/web.xml以支持跨域
把以下两块的注释去掉,变成如下:
 <!-- Uncomment following filter to enable CORS -->
   <filter>
        <filter-name>cross-origin</filter-name>
        <filter-class>org.eclipse.jetty.servlets.CrossOriginFilter</filter-class>
       <init-param>
           <param-name>chainPreflight</param-name>
           <param-value>false</param-value>
       </init-param>
       <init-param>
           <param-name>allowedOrigins</param-name>
           <param-value>*</param-value>
       </init-param>
       <init-param>
           <param-name>allowedMethods</param-name>
           <param-value>GET,POST,PUT,DELETE,HEAD,OPTIONS</param-value>
       </init-param>
       <init-param>
           <param-name>allowedHeaders</param-name>
           <param-value>*</param-value>
       </init-param>
    </filter>
   <!-- Uncomment following filter to enable CORS -->
    <filter-mapping>
        <filter-name>cross-origin</filter-name>
        <url-pattern>/*</url-pattern>
    </filter-mapping>
- 拷贝jetty-util
同时把geoserver-2.15.1/lib下的jetty-util-xxxx.jar包copy到geoserver-2.15.1/webapps/geoserver/WEB-INF/lib下
修改缓存路径
-
默认缓存路径可以通过以下方式查看
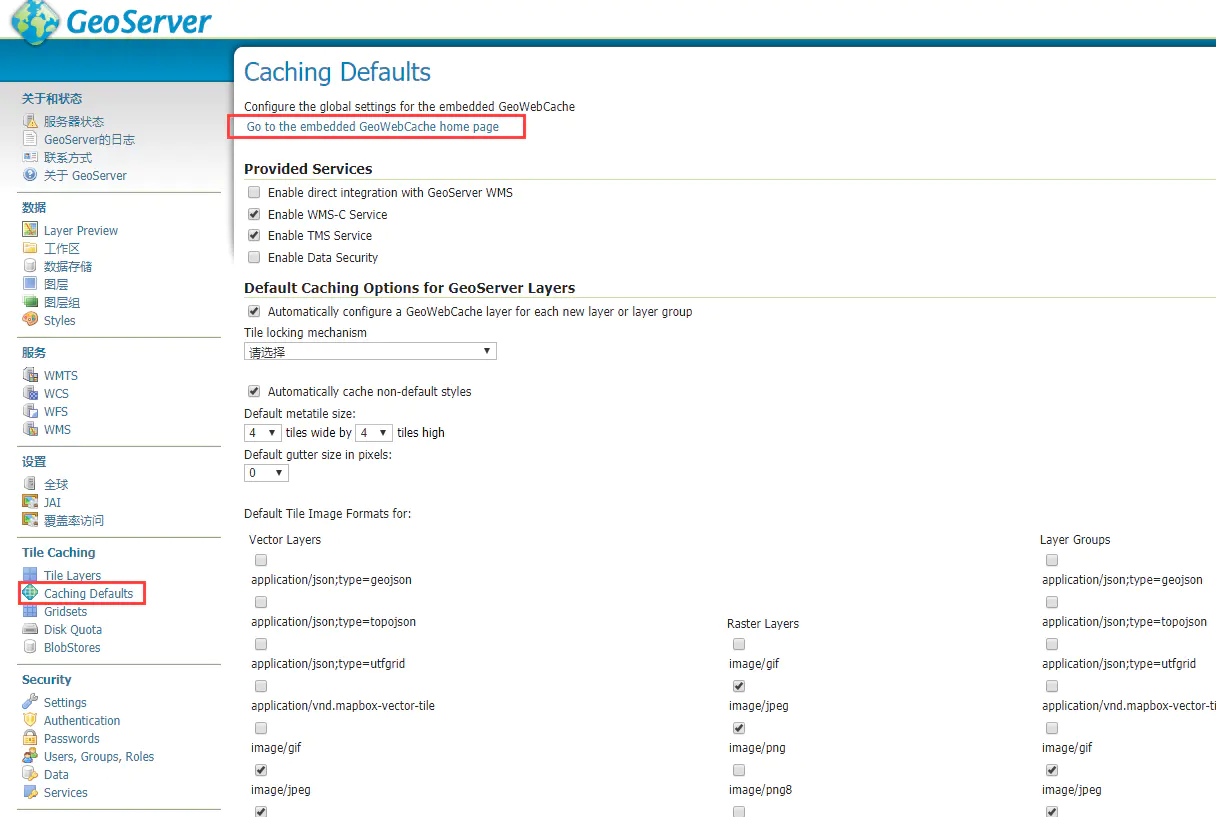
查看缓存路径
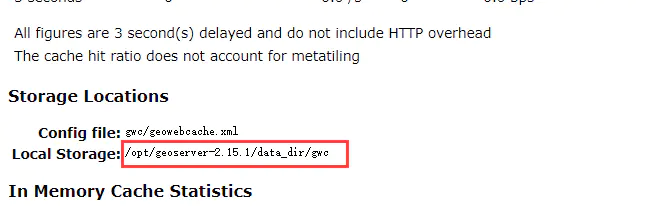 查看缓存路径
- 修改默认路径
vi webapps/geoserver/WEB-INF/web.xml
增加以下配置
<context-param>
    <param-name>GEOWEBCACHE_CACHE_DIR</param-name>
    <param-value>/tmp/geowebcache</param-value>
</context-param>
查看端口占用
netstat -tln
netstat -tln | grep 8080
查看端口被哪个进程占用
lsof -i :8080
解除端口占用
kill -9 pid
让jetty在后台运行,执行./startup.sh后,如果关闭SSH客户端,服务也会关闭,所以要换种方式
nohup ./startup
启动之后会进入到nohup的命令行,查看jetty控制台输出
tail -f nohup.out
nohup 如要指定其他输出文件可以进行重定向
nohup ./startup.sh > console.out 2>&1 &
关闭jetty比较简单,以相同方式修改shutdown.sh即可
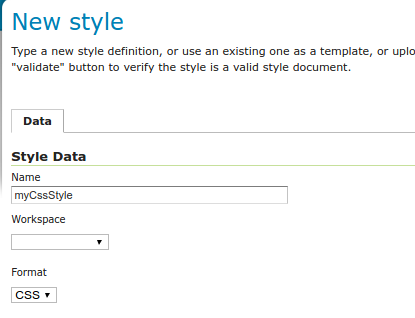
添加css支持
Installing the GeoServer CSS extension
The CSS extension is listed among the other extension downloads on the GeoServer download page.
The installation process is similar to other GeoServer extensions:
Download the https://build.geoserver.org/geoserver/2.19.x/ext-latest/geoserver-2.19-SNAPSHOT-css-plugin.zip
Verify that the version number in the filename corresponds to the version of GeoServer you are running (for example 2.19-SNAPSHOT above).
Extract the contents of the archive into the
WEB-INF/libdirectory in GeoServer. Make sure you do not create any sub-directories during the extraction process.Restart GeoServer.
If installation was successful, you will see a new CSS entry in the Styles editor.